
Vue 3부터는 vite 기반으로 프로젝트가 생성됩니다.
오늘은 npm과 yarn이 있다고 가정하고 프로젝트를 세팅하도록 하겠습니다.
기본적인 세팅을 함께하고, 제가 하는 프로젝트 초기 세팅도 함께 해보겠습니다.
Vue 3 생성하기
npm create vite@latest위 명령어를 입력하면 여러가지 설정을 할 수 있습니다.
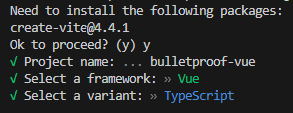
그리고 yarn을 입력해서 패키지를 설치합니다.
yarn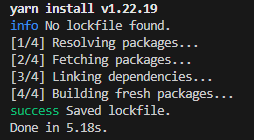
success가 뜨고, yarn lock 파일이 생긴 것을 볼 수 있습니다.
이제 실행해봅시다.
yarn dev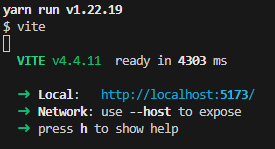
http://localhost:5173/ 에 접속해봅시다.
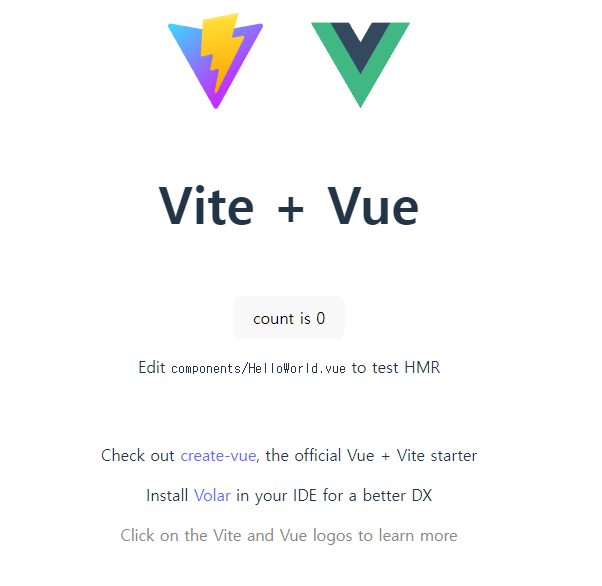
이렇게 간단히, 프로젝트를 생성하였습니다.
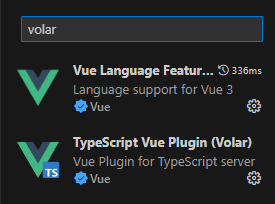
화면에 보이는 것처럼 VS CODE에 Volar를 설치하는 것이 더 편합니다.
Ant Design Vue 적용하기
이제 Ant Design Vue를 적용해보겠습니다.
yarn add ant-design-vue@4.xyarn add unplugin-vue-components -Droot 폴더의 vite.config.ts를 아래 내용으로 바꿔주세요.
import { defineConfig } from "vite";
import vue from "@vitejs/plugin-vue";
import Components from "unplugin-vue-components/vite";
import { AntDesignVueResolver } from "unplugin-vue-components/resolvers";
// https://vitejs.dev/config/
export default defineConfig({
  plugins: [
    vue(),
    Components({
      resolvers: [
        AntDesignVueResolver({
          importStyle: false, // css in js
        }),
      ],
    }),
  ],
});
이제 Ant Design Vue 설정이 다 되었습니다.
잘 되었는지 확인해봅시다.
App.vue를 아래 처럼 작성해주세요.
<script setup lang="ts">
import { Button } from "ant-design-vue";
</script>

<template>
  <Button>Ant Design Vue의 버튼!</Button>
</template>그리고 http://localhost:5173/ 이곳에서 확인해주세요.
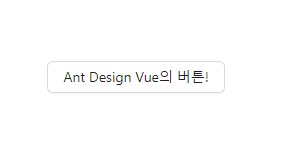
버튼이 보이면 성공입니다!
프로젝트 구조 세팅하기
Project structure는 아래 링크를 기반으로 합니다.
https://github.com/hirotaka/bulletproof-vue/blob/main/docs/project-structure.md
src
|
+-- assets            # assets folder can contain all the static files such as images, fonts, etc.
|
+-- components        # shared components used across the entire application
|
+-- config            # all the global configuration, env variables etc. get exported from here and used in the app
|
+-- features          # feature based modules
|
+-- composables       # encapsulate and reuse stateful logic used across the entire application
|
+-- lib               # re-exporting different libraries preconfigured for the application
|
+-- providers         # all of the application providers
|
+-- routes            # routes configuration
|
+-- stores            # global state stores
|
+-- test              # test utilities and mock server
|
+-- types             # base types used across the application
|
+-- utils             # shared utility functions
커스텀 Axios 추가하기
yarn add axiossrc /lib/commonAxios.ts 를 만들어주세요.
* 앞으로 얘기 안해도 중간의 폴더(여기서는 lib)도 만들어야합니다.
commonAxios.ts는 아래에 있습니다.
import { notification } from "ant-design-vue";
import axios from "axios";

const cancelTokenSource = axios.CancelToken.source();

const commonAxios = axios.create({
  cancelToken: cancelTokenSource.token,
});

commonAxios.interceptors.request.use(function (config): any {
  if (typeof window === undefined) {
    return;
  }

  // 이 부분에 cookie 확인해서 유효성 검증하는 코드를 추가할 수 있습니다.

  config.headers = Object.assign({}, config.headers, {
    "Content-Type": "application/json",
    // 'access_token': cookies['access_token'],
  });

  return config;
});

commonAxios.interceptors.response.use(
  function (response) {
    return response;
  },
  function (error) {
    console.log(error);
    console.error("error", error?.response);
    const errorCode = String(error?.response?.status ?? "");

    if (errorCode === "401") {
      notification.error({
        key: "error-notification",
        message: "토큰이 만료되었습니다. 로그인을 다시 해주세요.",
        description: errorCode,
      });
    } else if (errorCode === "403") {
      notification.error({
        key: "error-notification",
        message: "권한이 없습니다.",
        description: errorCode,
      });
    } else {
      notification.error({
        key: "error-notification",
        message: "API 에러 발생",
        description: errorCode,
      });
    }
    return Promise.reject(error);
  }
);

export default commonAxios;앞으로 api를 만들 때에는 axios 말고 우리가 만든 commonAxios를 사용해야합니다.
App.vue 수정하기.
yarn add vue-routeryarn add sasssrc/App.vue를 수정해주세요.
<script setup lang="ts">
import { RouterView } from "vue-router";
</script>

<template>
  <div class="app">
    <router-view class="header" name="header" />
    <div class="contents">
      <router-view class="body" name="body" />
    </div>
    <router-view class="footer" name="footer" />
  </div>
</template>

<style lang="scss" scoped>
.app {
  color: rgba(0, 0, 0, 0.85);
  display: flex;
  position: fixed;
  width: 100%;
  height: 100%;
  flex-direction: column;
}

.contents {
  display: flex;
  flex-direction: column;
  width: 100%;
  height: 100%;
  min-width: 600px;
  overflow-y: auto;
}
</style>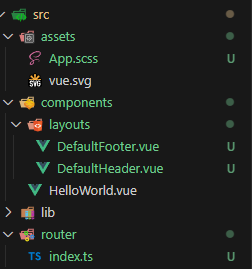
src 밑에 위 사진을 참고해서 파일들을 만들어주세요.
App.scss
DefaultFooter.cue
DefaultHeader.vue
router/index.ts입니다.
각 파일의 내용은 아래에 있으니 차분히 옮겨줍시다.
App.scss
scss는 기본적인 스타일을 넣어놨으므로, 필요에 따라 수정해도 됩니다.
:host {
  width: 100%;
  height: 100%;
}

*::-webkit-scrollbar {
  width: 16px;
  height: 16px;
}

*::-webkit-scrollbar-track {
  background: transparent;
}

*::-webkit-scrollbar-thumb {
  border: 6px solid rgba(0, 0, 0, 0);
  background-clip: padding-box;
  border-radius: 8px;
  background-color: rgba(0, 0, 0, 0.45);
}

html,
body {
  padding: 0;
  margin: 0;
  width: 100%;
  height: 100%;
}

#app {
  height: 100%;
}
DefaultFooter
<template>
  <div class="footer">
    <span class="copyright-string footer-text">
      Copyright ⓒ SSAFY Corporation. All Rights Reserved.
    </span>
    <router-link class="terms-of-use-link footer-text" to="/">
      이용약관
    </router-link>
    <router-link class="privacy-link footer-text" to="/">
      개인정보처리방침
    </router-link>
  </div>
</template>

<style lang="scss" scoped>
.footer {
  display: flex;
  justify-content: center;
  text-align: center;
  height: 26px;
  margin: 5px 0;
}
.footer-logo {
  width: 105px;
}
.copyright-string {
  margin-left: 40px;
}
.terms-of-use-link,
.privacy-link {
  margin-left: 12px;
}
.footer-text {
  font-size: 12px;
  color: rgba(0, 0, 0, 0.45);
}
</style>DefaultHeader
<script setup lang="ts">
import { ref } from "vue";
import { RouterLink } from "vue-router";

const menuKey = ref<string[]>([window.location.pathname]);
</script>

<template>
  <a-layout id="components-layout">
    <a-layout-header
      :style="{ position: 'fixed', width: '100%', overflow: 'hidden' }"
    >
      <div style="float: left">
        <router-link to="/" class="app-logo">Home </router-link>
      </div>

      <div class="nav-right">
        <!-- 로그인 -->
        <a-button class="login-button"> 로그인 </a-button>
        <span class="app-bar-padding" />
      </div>
      <a-menu
        v-model:selectedKeys="menuKey"
        class="menu"
        theme="dark"
        mode="horizontal"
        :style="{ lineHeight: '64px' }"
      >
        <a-menu-item key="/">
          <RouterLink to="/"> MenuItem </RouterLink></a-menu-item
        >
        <a-menu-item key="/#">
          <RouterLink to="/#"> MenuItem2 </RouterLink>
        </a-menu-item>
      </a-menu>
    </a-layout-header>
  </a-layout>
</template>

<style lang="scss" scoped>
#components-layout {
  height: 70px;
  width: 100%;
  margin-bottom: 1px;
  display: flex;
  justify-content: space-between;
  align-items: center;
  z-index: 1;
}

#components-layout .menu {
  float: right;
}

#components-layout .nav-right {
  float: right;
  padding-left: 20px;
}

.login-button {
  font-weight: 900;
}
</style>router/index.ts
import { createRouter, createWebHistory } from "vue-router";
import HelloWorld from "../components/HelloWorld.vue";
import DefaultHeader from "../components/layouts/DefaultHeader.vue";
import DefaultFooter from "../components/layouts/DefaultFooter.vue";

const router = createRouter({
  history: createWebHistory(import.meta.env.BASE_URL),
  routes: [
    {
      path: "/",
      name: "hello",
      components: {
        header: DefaultHeader,
        body: HelloWorld,
        footer: DefaultFooter,
      },
    },
  ],
});

export default router;
router와 App.scss를 적용하기 위해 src/main.ts를 수정합니다.
import { createApp } from "vue";
import "./assets/App.scss";
import App from "./App.vue";
import router from "./router";

const app = createApp(App);

app.use(router);
app.mount("#app");'Study > Frontend' 카테고리의 다른 글
| TDD 테스트 주도 개발 방법론 (1) | 2023.10.28 |
|---|---|
| REST API (0) | 2023.10.27 |
| fork + template으로 프로젝트 초기설정 날로 먹기 (0) | 2023.10.20 |
| 프론트엔드 과목 평가 준비 (0) | 2023.09.17 |
| Frontend 뉴비들이 많이 하는 실수 모음집 (HTML, CSS 편) (2) | 2023.09.03 |